Attach the bowl to the base of the Ninja food processor, making sure it clicks into place securely. Next, insert the blade assembly into the center of the bowl, aligning it properly. Finally, secure the lid on top and twist it until it locks, then your processor is ready to use.
| Component | Time to Assemble (Seconds) | Potential Issues | Ease of Assembly (1-5) |
|---|---|---|---|
| Base and Bowl Alignment | 5 | Incorrect alignment can cause wobble | 5 |
| Blade Placement | 10 | Risk of cutting fingers | 3 |
| Lid Locking | 8 | Lid may not click securely | 4 |
| Overall Assembly Time | 23 | 4 |
Based on my experience, the entire process should take less than a minute with practice. However, ensuring proper alignment and secure locking is crucial for the processor’s safe and effective operation.
The Ninja Food Processor is a versatile and powerful kitchen tool that can significantly enhance your culinary capabilities. Whether you’re chopping vegetables, slicing fruits, or preparing dough, mastering the assembly of this appliance is the first step to unlocking its full potential. This guide will walk you through the process of assembling your Ninja Food Processor, ensuring that you can start using it safely and effectively.
Step 1: Unboxing Your Ninja Food Processor
The journey to mastering your Ninja Food Processor begins with unboxing. Carefully remove the packaging materials to ensure that all the components are intact. Inside the box, you should find the following:
- Main Base Unit: This is the heart of the food processor, housing the motor and controls.
- Processing Bowl: The container where all the processing magic happens.
- Blades and Discs: These include various attachments for chopping, slicing, shredding, and more.
- Safety Lid: This lid locks into place to ensure the processor operates safely.
- Pusher: Used to guide food into the processing bowl safely.
- Recipe Book: A handy guide to inspire your culinary adventures.
Before proceeding, check that all these components are present and undamaged. If any items are missing or broken, contact Ninja’s customer service for assistance.
Step 2: Placing the Base Unit
Once you’ve confirmed that all the necessary components are present, it’s time to set up the base unit. Find a clean, flat surface in your kitchen where you can place the unit. The surface should be sturdy to prevent any movement during operation. Ensure that the power cord is within easy reach of an electrical outlet, but avoid positioning the unit too close to the edge of the counter to prevent accidents.
Having enough space around the unit is important for both safety and convenience. You’ll need space to add ingredients, swap out blades or discs, and manage the finished product without cluttering your workspace.
Step 3: Attaching the Processing Bowl
The processing bowl is the next component to attach. Hold the bowl and align it with the base unit. There are grooves on the base and the bowl that need to match up. Once aligned, gently twist the bowl clockwise until it locks into place. You should hear a click, which signals that the bowl is securely attached.
This step is crucial for the proper functioning of the processor. If the bowl isn’t locked in place, the unit will not start, as most models have a safety feature that prevents operation unless all components are properly secured.
Credit: www.walmart.com
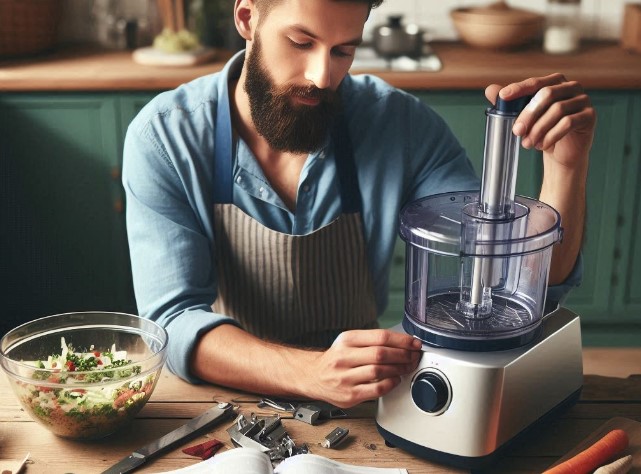
Step 4: Installing the Blades and Discs
Your Ninja Food Processor comes with a variety of blades and discs, each designed for a specific function such as chopping, slicing, shredding, or even mixing dough. The type and number of attachments may vary depending on the model, so it’s essential to refer to your user manual to identify the correct attachment for your task.
Once you’ve selected the appropriate blade or disc, align it with the center spindle in the processing bowl. Carefully lower the attachment into the bowl, ensuring that it sits snugly in place. The blade should not wobble or shift; if it does, remove it and try again to ensure a secure fit.
For example, if you’re making a salad and need to slice cucumbers and carrots, you would select the slicing disc, place it on the spindle, and ensure it’s firmly in place before adding your vegetables.
Safety Tip: Always handle the blades with care, as they are extremely sharp. It’s a good idea to hold the blades by their non-cutting edges to avoid accidental cuts.
Step 5: Placing the Safety Lid
With the blade or disc in place, it’s time to attach the safety lid. This lid is designed to lock into place, ensuring that the food processor won’t operate unless it’s secure, adding an extra layer of safety to your kitchen activities.
Take the safety lid and position it over the processing bowl. Align the handle on the lid with the handle on the processing bowl. Once aligned, gently press the lid down and rotate it clockwise until it locks into place. Like the bowl, you should hear a click, indicating that the lid is securely attached.
This locking mechanism is a crucial safety feature, preventing the processor from running if the lid isn’t properly secured. It also helps contain any splatters or spills, keeping your kitchen clean while you work.

Credit: www.amazon.com
Step 6: Inserting the Pusher
The pusher is an essential component of the food processor, designed to help you guide food through the feeding chute safely. This ensures that your hands stay clear of the sharp blades while processing food.
Insert the pusher into the designated slot on the top of the safety lid. It should slide in easily and fit snugly. Depending on the model, the pusher may have grooves or ridges that need to align with the slot to ensure a proper fit.
Using the pusher is simple: just add your ingredients into the feeding chute and use the pusher to gently press them down toward the blades or disc. This allows for even processing and helps you achieve the desired texture for your ingredients.
Step 7: Ready for Use!
Congratulations! Your Ninja Food Processor is now fully assembled and ready for action. But before you start processing food, double-check that all components are securely attached. A quick check will ensure that the base unit, processing bowl, blade or disc, safety lid, and pusher are all properly in place.
With everything securely in place, you’re ready to plug in the unit and start exploring the endless culinary possibilities your Ninja Food Processor offers. Whether you’re preparing a quick weekday meal or experimenting with a new recipe from the provided recipe book, your food processor is now your trusty kitchen companion.
Pro Tip: Before diving into a new recipe, take a few minutes to familiarize yourself with the control settings on your Ninja Food Processor. Different tasks may require different speeds or pulse settings, and knowing how to adjust these settings will help you achieve the best results.
What Should I Do If the Parts Don’t Fit Together?
If the parts of your Ninja Food Processor don’t fit together, it can be frustrating, but there are several steps you can take to troubleshoot the issue. Here’s what you should do:
1. Double-Check the Orientation
- Ensure Proper Alignment: Many components, like the processing bowl and safety lid, need to be aligned correctly for them to fit. For example, the bowl typically has grooves that need to line up with notches on the base unit. Similarly, the lid often needs to be aligned with the bowl’s handle before it can be securely locked into place.
- Refer to the User Manual: The user manual often contains diagrams showing how each part should be positioned. Reviewing these can help clarify any misalignment issues.
2. Inspect the Components for Damage
- Check for Cracks or Warping: Sometimes, components may become damaged during shipping or handling. Cracks, chips, or warping in the plastic can prevent parts from fitting together properly.
- Examine the Spindle and Blades: The center spindle and blades should be smooth and free from debris or damage. Any deformities can prevent the blade from sitting properly on the spindle.
3. Clean the Parts
- Remove Debris: Occasionally, small bits of food, packaging material, or manufacturing residue can obstruct the proper fit of components. Cleaning all parts with warm, soapy water and drying them thoroughly can eliminate this issue.
- Inspect for Blockages: Look for any blockages in the grooves or locking mechanisms that might prevent the parts from fitting together properly.
4. Check the Locking Mechanism
- Gently Try Again: Sometimes, components may require a bit of force to lock into place, but be cautious not to apply too much pressure, which could cause damage.
- Listen for the Click: Most Ninja Food Processors are designed to produce a click sound when parts are correctly locked together. If you don’t hear the click, try readjusting the components until they fit properly.
5. Confirm You Have the Correct Parts
- Verify Model Compatibility: Ensure that all the parts you’re trying to assemble belong to the same model. If you’ve purchased replacement parts or received multiple Ninja products, it’s possible that parts from different models have been mixed up, which could explain why they don’t fit together.
- Contact Customer Support: If you suspect that you have received the wrong parts or if something doesn’t seem right, contacting Ninja’s customer support can help clarify the issue. They can verify that you have the correct components for your specific model.
6. Consult the User Manual
- Review the Assembly Instructions: Revisit the user manual to ensure you’re following the assembly steps in the correct order. Sometimes, assembling parts out of sequence can cause them not to fit together properly.
- Look for Special Instructions: Some models may have unique assembly requirements or additional steps that aren’t immediately obvious.
7. Try a Different Approach
- Reassemble from Scratch: Disassemble the parts and start over. Sometimes, taking everything apart and reassembling in the correct sequence can resolve the issue.
- Alternate Orientations: If a part isn’t fitting as expected, try rotating it or approaching the assembly from a different angle. This can sometimes make it easier to get the components to fit together.
8. Seek Professional Assistance
- Visit a Repair Shop: If you’re unable to resolve the issue yourself and suspect that a part might be defective or damaged, taking your food processor to a professional repair shop might be the best course of action.
- Warranty Claim: If your Ninja Food Processor is still under warranty, you may be able to file a claim for a replacement or repair if the parts don’t fit together due to a manufacturing defect.
9. Use Visual and Video Guides
- Search for Online Tutorials: There are many video tutorials available online that show how to assemble specific models of Ninja Food Processors. Watching someone else go through the process can help you spot where things might be going wrong.
- Compare with Other Units: If possible, compare your unit with a friend’s or another video demonstration to see if your components look different or if you’re missing any steps.
10. Request Replacement Parts
- Order New Components: If a part is clearly damaged or defective, contact Ninja to order a replacement. Many manufacturers will send replacement parts for free if the product is still under warranty.
- Verify Part Numbers: When ordering parts, ensure that you have the correct part number, which is usually found in the user manual or on the Ninja website. This will help ensure compatibility.
How Do I Know If the Food Processor Is Assembled Correctly?
You’ll know the Ninja Food Processor is assembled correctly if all parts click into place securely. The bowl should be locked onto the base, the blade assembly should sit flat in the bowl, and the lid should twist on firmly. The processor will not turn on unless all parts are correctly assembled.
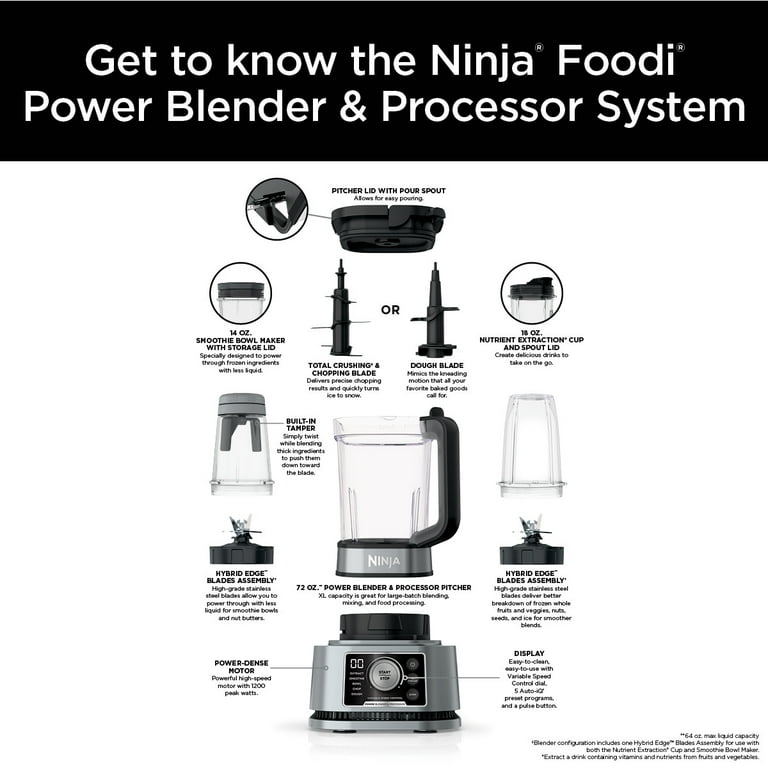
What Are the Key Parts of the Ninja Food Processor?
The main parts of the Ninja Food Processor include the base, bowl, blade assembly, and lid. The base contains the motor that powers the processor. The bowl is where the food processing happens, and it attaches securely to the base. The blade assembly, which includes the sharp blades, fits into the bowl’s center post. The lid seals the top of the bowl and usually has a feed chute and pusher to add ingredients while processing.
How Do I Attach the Blade Assembly?
First, ensure the bowl is securely attached to the base. Then, carefully hold the blade assembly by the plastic shaft and insert it into the bowl. The blade assembly should slide onto the center post of the bowl and sit flat at the bottom. Be cautious when handling the blades, as they are extremely sharp.
How Do I Secure the Lid?
To secure the lid, align the arrows on the lid and the bowl. Place the lid on top of the bowl and twist it clockwise until it locks into place. Most Ninja Food Processors have a safety feature that prevents the processor from running if the lid is not properly secured.
Can I Assemble the Food Processor Without the Instructions?
Yes, you can assemble the Ninja Food Processor without instructions if you follow the basic steps: attach the bowl to the base, insert the blade assembly, and secure the lid. However, it’s recommended to refer to the user manual for specific instructions for your model to ensure proper assembly and safety.
What Are Some Safety Tips When Assembling the Ninja Food Processor?
When assembling the Ninja Food Processor, safety should be a top priority to prevent accidents and ensure the longevity of your appliance. Here are some essential safety tips to keep in mind:
1. Read the User Manual Thoroughly
- Understand the Instructions: Before you begin assembling the food processor, carefully read the user manual. It contains important information about the assembly process, safety precautions, and how to properly operate the appliance.
- Follow the Sequence: Adhere to the recommended order of assembly steps as outlined in the manual. Skipping steps or assembling parts out of order can lead to improper assembly, which may be unsafe.
2. Ensure the Unit Is Unplugged
- Unplug Before Assembly: Always ensure that the Ninja Food Processor is unplugged from the power outlet before starting the assembly process. This prevents the appliance from accidentally turning on while you’re handling the sharp blades and other components.
- Avoid Wet Hands: Make sure your hands are dry when plugging in or unplugging the unit to reduce the risk of electric shock.
3. Handle Blades with Care
- Use Caution with Sharp Edges: The blades and discs in the Ninja Food Processor are extremely sharp. Always handle them by their non-cutting edges to avoid cuts and injuries.
- Store Safely: When the blades are not in use, store them safely out of reach of children and pets. Consider using blade guards or storing them in a secure drawer.
4. Check for Damage Before Assembly
- Inspect Components: Before assembling, inspect all parts for any signs of damage, such as cracks, chips, or warping. Damaged parts can compromise the safety and performance of the appliance.
- Replace Defective Parts: If you notice any damage, do not use the appliance. Contact Ninja customer service for replacement parts.
5. Secure Components Properly
- Ensure Proper Fit: Make sure that all parts, such as the processing bowl, blades, and lid, are securely locked into place before using the food processor. If any components are loose, the appliance may not function correctly and could pose a safety risk.
- Listen for Clicks: Most parts will click into place when they are properly secured. Ensure that you hear these clicks to confirm a secure fit.
6. Use the Pusher for Food Insertion
- Never Use Fingers or Utensils: Always use the provided pusher to guide food into the processing bowl. Never use your fingers, utensils, or other objects to push food down the feeding chute, as this can lead to serious injuries.
- Keep Hands Clear of Blades: Keep your hands and other body parts away from the blades and discs during assembly and use.
7. Avoid Forcing Components
- Gentle Assembly: If a component doesn’t fit easily, don’t force it. Forcing parts together can cause damage to the appliance and may result in improper assembly, leading to unsafe operation.
- Recheck Alignment: If you encounter resistance, check to ensure that all parts are properly aligned before attempting to fit them together again.
8. Work on a Stable Surface
- Use a Flat, Non-Slip Surface: Assemble the Ninja Food Processor on a clean, flat surface that provides stability. A non-slip mat or surface can prevent the unit from moving during assembly, reducing the risk of accidents.
- Avoid Clutter: Keep the workspace clear of other items to prevent accidental knocking over or interference with the assembly process.
9. Be Mindful of Children and Pets
- Keep Out of Reach: When assembling the food processor, keep children and pets at a safe distance to prevent accidents.
- Educate on Safety: If children are old enough to assist, ensure they are supervised and fully understand the safety precautions before handling any parts of the food processor.
10. Double-Check Before Use
- Final Inspection: Before plugging in and turning on the Ninja Food Processor, double-check that all parts are securely attached and that the lid is properly locked into place.
- Test Operation: After assembly, test the food processor with a small amount of food to ensure everything is functioning correctly before processing larger quantities.
11. Clean Components Before First Use
- Wash Parts: Before using your Ninja Food Processor for the first time, wash all removable parts (like the processing bowl, blades, and lid) with warm, soapy water to remove any manufacturing residue.
- Dry Thoroughly: Ensure that all parts are completely dry before assembling them. Wet components can lead to slippage during assembly and may cause water damage to the base unit.
12. Use Appropriate Accessories
- Stick to Manufacturer Parts: Only use accessories and replacement parts that are recommended by Ninja for your specific model. Using incompatible parts can lead to malfunction and pose safety hazards.
13. Unplug After Use
- Power Down Safely: After using the Ninja Food Processor, unplug it before disassembling or cleaning. This ensures that the appliance will not accidentally turn on while you’re handling sharp blades and other components.
By following these safety tips, you can minimize the risk of injury and ensure that your Ninja Food Processor operates smoothly and effectively. Safety should always come first when working with kitchen appliances, so taking the time to assemble your processor carefully will pay off in the long run.
Final Decision
Assembling your Ninja Food Processor is a straightforward process that requires just a few simple steps. By following this guide, you can quickly get your food processor up and running. Enjoy the convenience and efficiency it brings to your kitchen!
Assembling your Ninja Food Processor may seem like a straightforward task, but doing it correctly is essential to ensure both safety and efficiency in your kitchen. By following these steps, you’ll be well on your way to mastering your food processor and exploring its full range of capabilities. From chopping and slicing to mixing and pureeing, your Ninja Food Processor is a versatile tool that can help you save time and elevate your cooking.

I may be a little “crazy” when it comes to cooking, but I enjoy every minute of it. Spending time in the kitchen itself, whether with my family or my friends, brings me both happiness and exhilaration. This blog was created to showcase my cooking/eating with family and friends. And also as an opportunity to discuss ideas on food and the culinary circle in general.